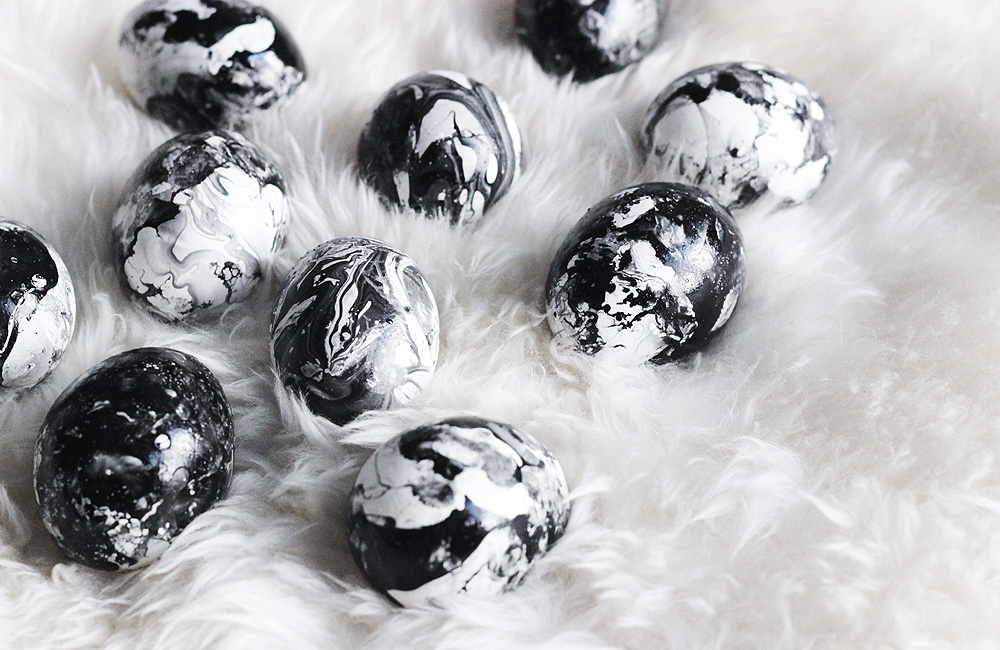
Never thought these words would come out of my mouth, but…hot damn, these eggs are SEXY.
And, they’re so easy! My 7-year-old and I made them together using supplies you probably already have in your home.
I actually had delusions of grandeur about this last year (and then again at Halloween with pumpkins), considering PAINTING them — but thank goodness for Alice & Lois for providing an indigo version and much simpler solution…with nail polish! And now having gone through their steps, I do have a few additional suggestions for a foolproof craft session that you can — really — do with your kids.
SUPPLIES
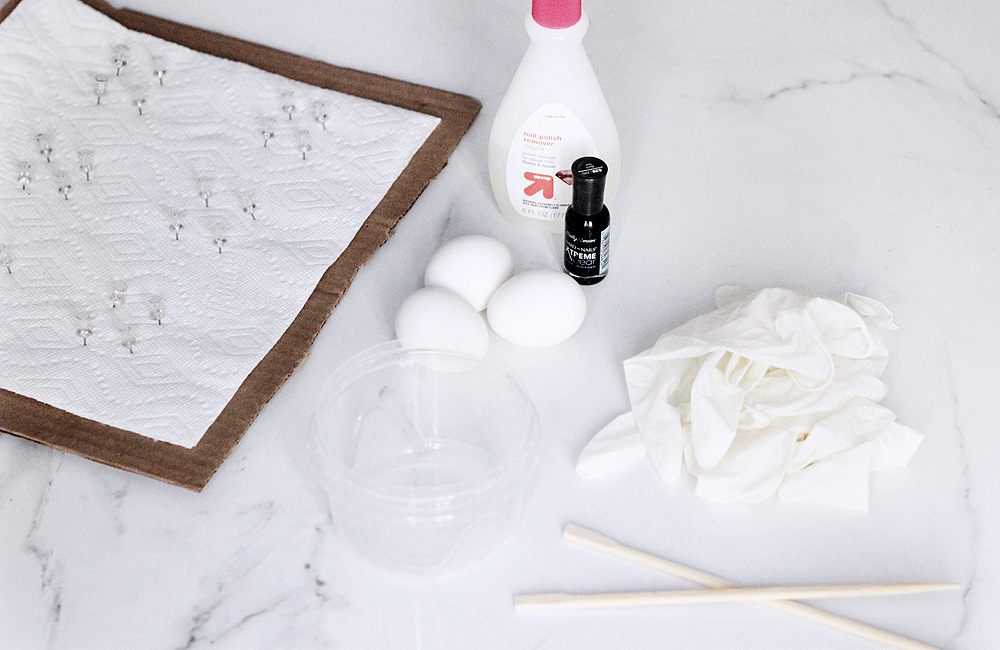
What you need:
- Hard-boiled eggs (put eggs in large pot in a single layer; cover with cold water; bring to a rolling boil; remove from heat; take eggs out when water is cooled enough)
- Tepid water (warmer than room temperature; I found if the water is even a bit cold, the nail polish sinks quickly)
- Black nail polish (pick up two bottles for 12 eggs)
- Tupperware or disposable bowl (you will definitely need to toss it!)
- Stir sticks (2-3 for 12 eggs)
- Disposable gloves (to be safe, one per 1-2 eggs — IOW, a pack of 6-12 for 12 eggs)
- Drying rack (I made one with cardboard, paper towels, and 4 pins per egg)
- Nail polish remover & extra paper towels (for cleanup)
STEP 1: PREPARE THE MARBLING
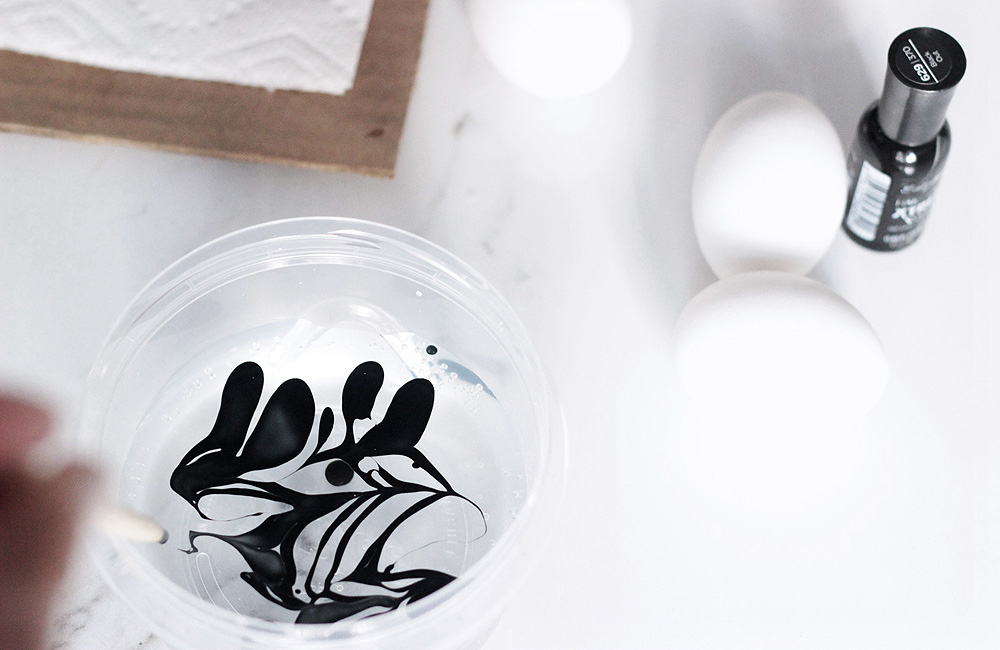
You want this step to be fairly quick, so be ready! The water should be warmer than room temperature, because it cools quickly and you’ll want to do as many eggs as you can per bowl of water. Drizzle (don’t pour) the nail polish into perpendicular lines into the water and grab your stir stick to create the marbling effect, cutting through the lines. More nail polish will cover more of the egg and make it darker. I played around with the amount of nail polish and stirring to get different effects, and found areas of no polish vs. areas of dark polish created the most dramatic effect.
STEP 2: DIP, SWIRL & COAT THE EGG
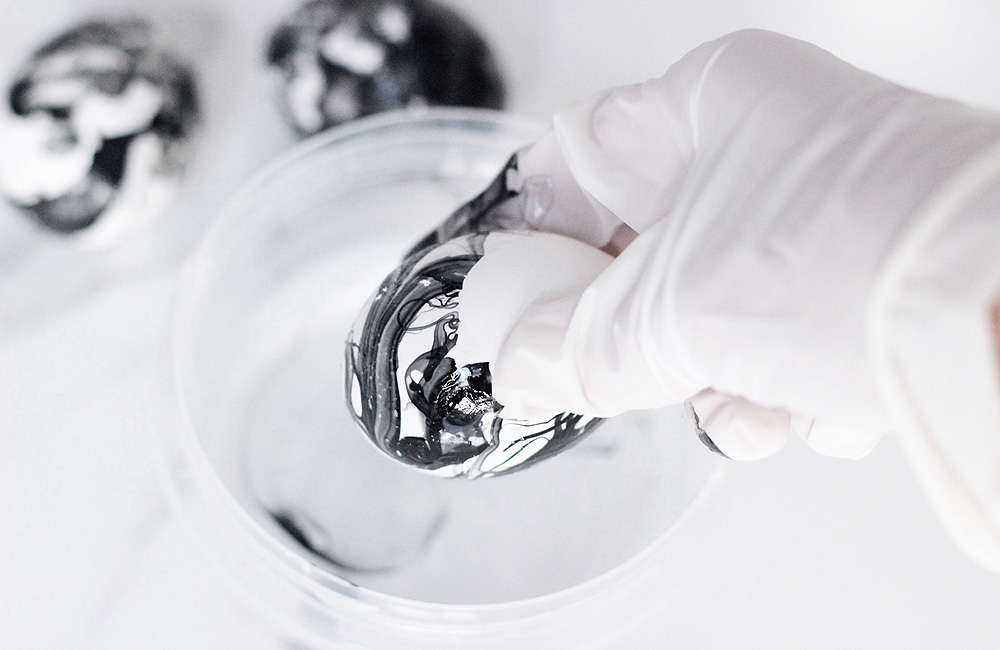
Be sure to wear a glove! Think of the nail polish like a film of oil on top of the water — once you dip the egg, you want to swirl the egg down, around and up out through the layer of nail polish to grab the color to coat the egg. It sticks fairly easily, so you’ll only have to coat it once. With blank areas, dip it back in again, catching leftover nail polish on your way out of the water (or not…I actually liked the look of white space on a few of the eggs).
STEP 3: DRY THE EGGS
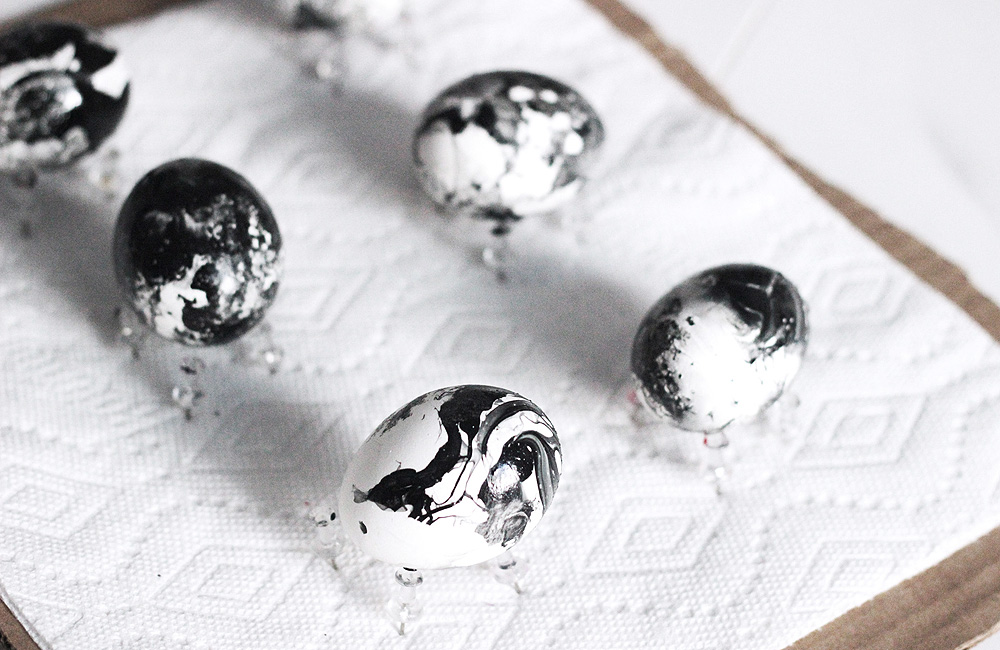
As mentioned, I made the “drying rack” with what I had handy: a piece of cardboard, paper towels, and push pins. One tip: when pushing the pins into the cardboard, better that the pins angle inward to hold the eggs. (If they’re outward, once you place the egg on them, the weight could push the pins out and down, and the egg will fall through.) The nail polish dries quickly; you can wipe the beads of water off after about 5-10 minutes and reuse the rack for more eggs.
VOILÀ!
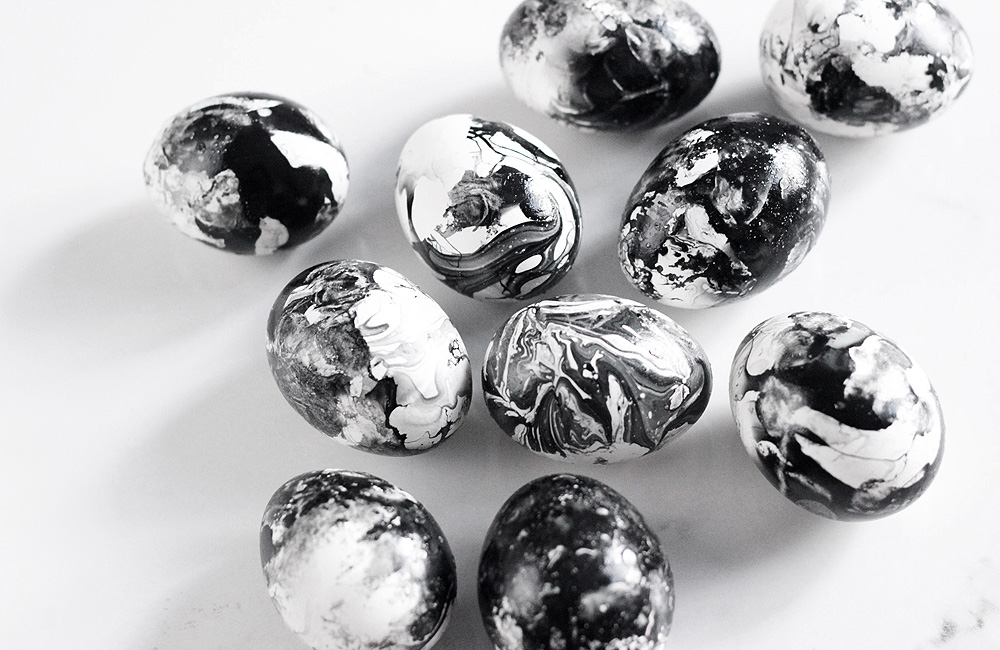
Such fun and so pretty when they’re all together! Definitely play with different amounts of coverage so they take on a unique look all their own.
One last note: my daughter made more eggs using different colors of nail polish. We found that the darker colors and newer polish looked the best.
Happy Easter!
![]()
Photos & styling by Erika Brechtel; tutorial adapted from Alice & Lois

erika you never fail! so creative!