Ready for her close-up!
Today I got to style this kitchen set for a client, and after sharing a “before & after” on Instagram stories, I was pleasantly surprised to receive DM requests to blog about it!
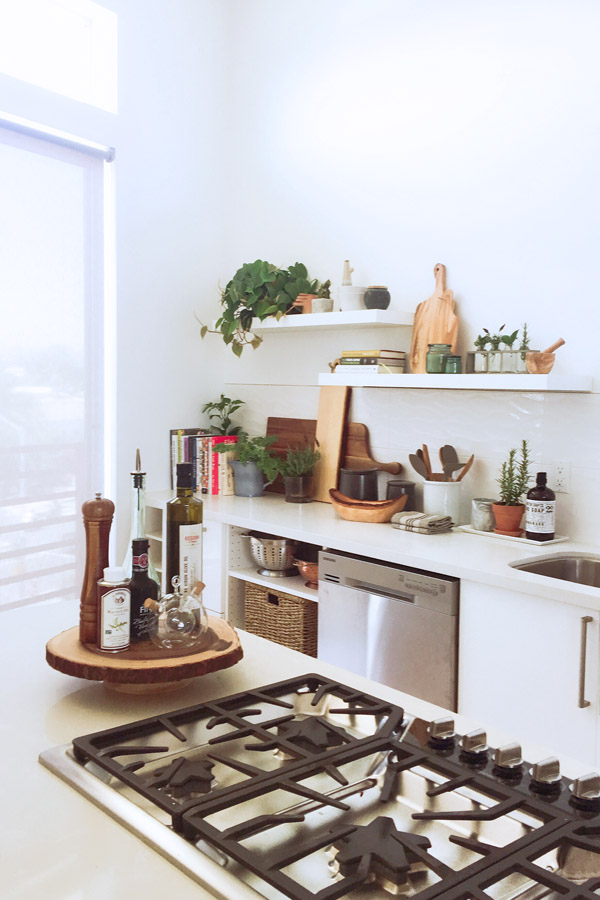
I know when looking at a blank canvas, it can be intimidating….where to start? What to buy? So, here are a few steps to get you started, and best of all, you can shop this entire kitchen right here (how fun is that?!). Side note: the bowls are empty in these photos because the client isn’t filming for a few weeks. Obviously, I recommend filling them with your favorite fruits, tomatoes, faux veggies, etc.!

Step 1: Pick a color & material scheme
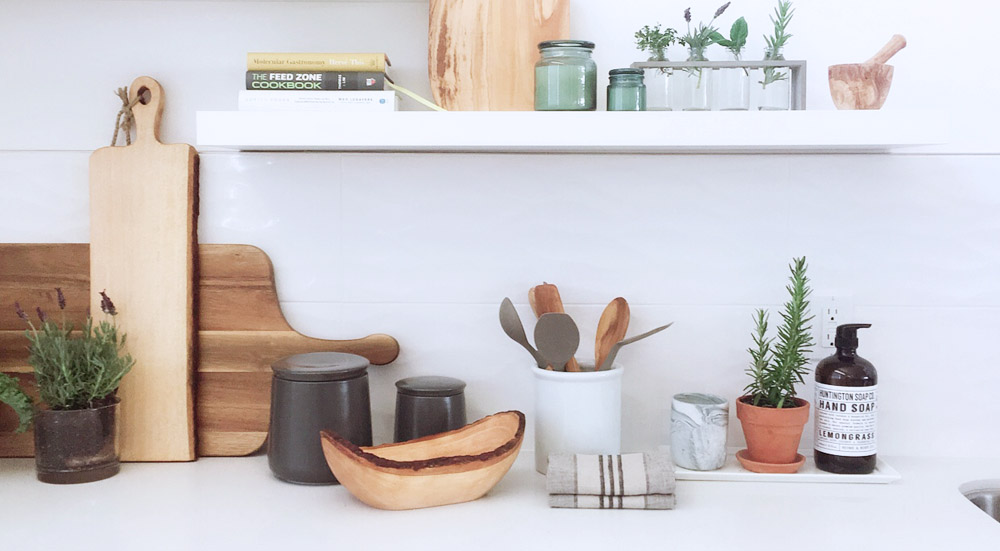
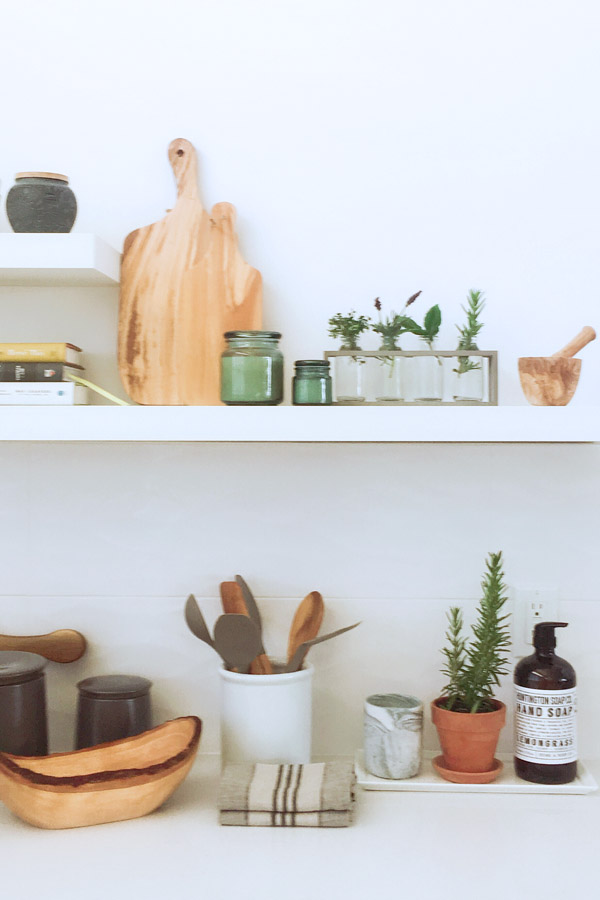
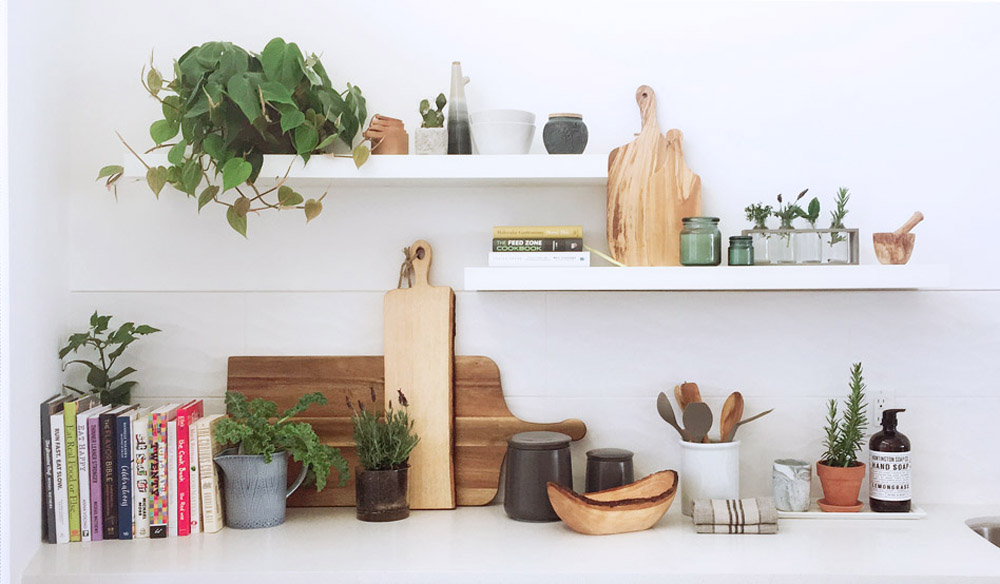
With so much sterile white, I wanted to add some natural texture with woods and plants. To keep the kitchen neutral (gender and color-wise) for filming, I added in shades of grays and muted blue-greens. Tip: pitchers make great planters (like the blue one here…also a great bookend!).

–
Step 2: Work in small groupings
With this much wide open countertop and shelving, it’s easiest to break it up into smaller groupings of items. I like to mix the colors and materials (such as gray – wood – white – gray – wood – white), but be sure to include pairs of a few items so it doesn’t end up looking too too cluttered. Tip: my new fave hack is stacking cutting boards of different sizes!
–

Step 3: Baskets!
To avoid exposed clutter (or sparse shelves), use large baskets. Even if you don’t have anything to fill them, they add natural texture to balance out the sterile white. Tip: these baskets are a great price at $20/ea. (but only available in-store at World Market)!
–
Step 4: Trays!
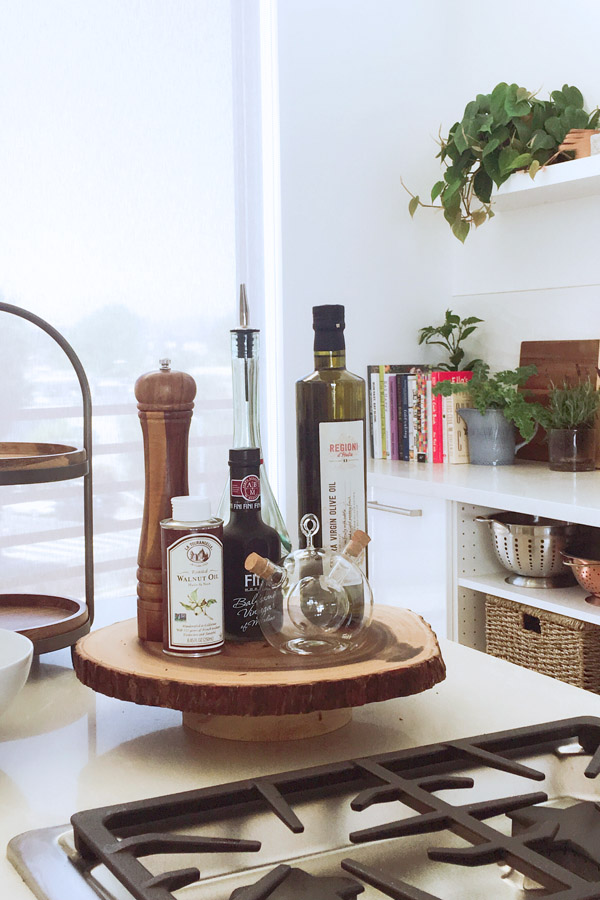
Using trays is an easy way to keep everything tidy so you don’t have a ton of random items floating around. Tip: use the “low-high-low” trick: put the taller items in the middle/back, and tier down.
–
BEFORE…

AFTER!
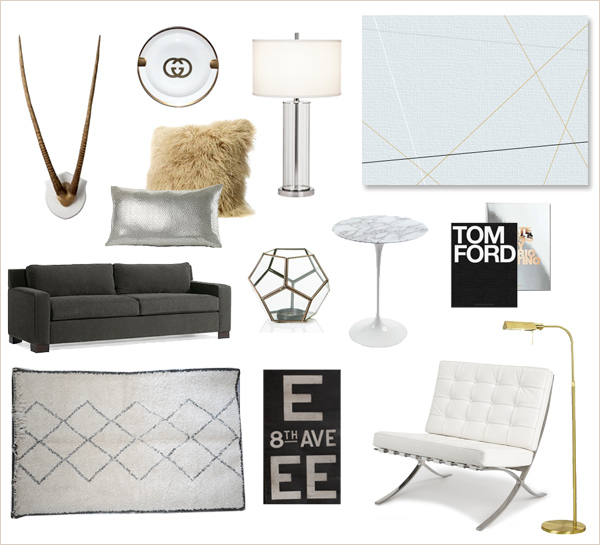
Get the look:
–
![]()
Styling & (iPhone) pics by Erika Brechtel