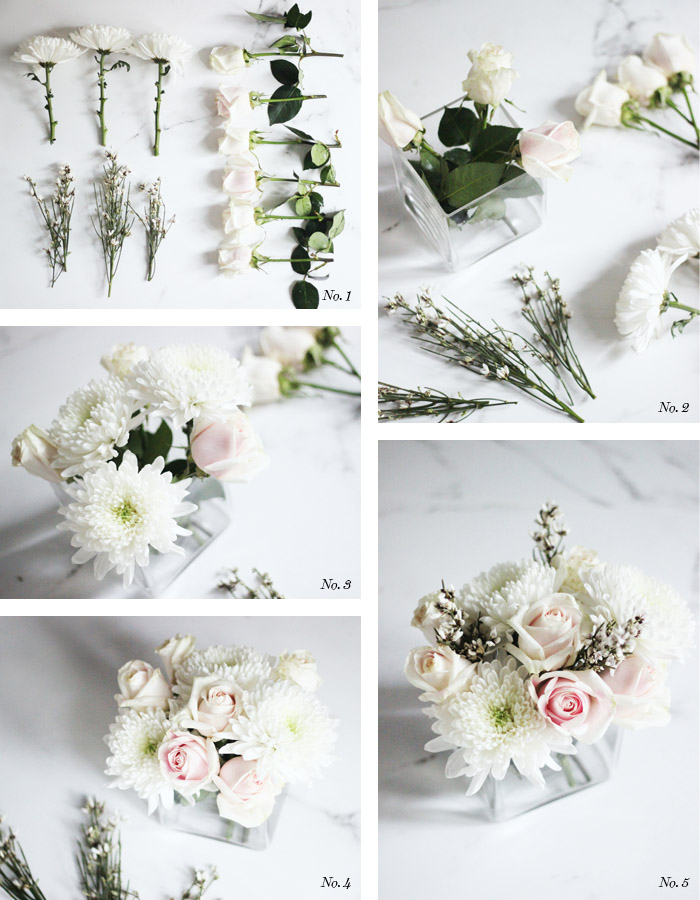
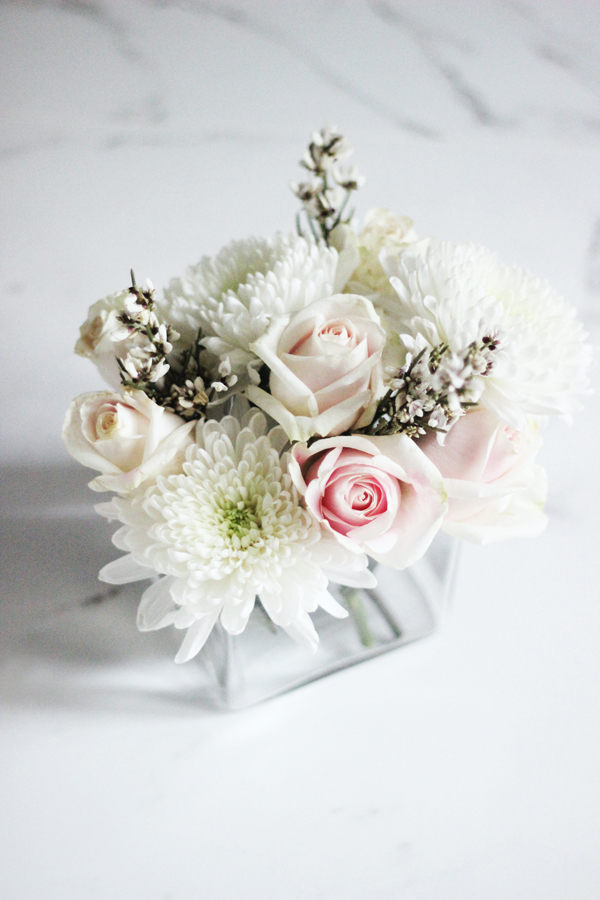
This past weekend was busy and packed with volunteering, quality time with friends and a little entertaining. Sunday morning I hosted a small brunch for a few ladies, and whipped up two arrangements using flowers I picked up with my groceries at the supermarket. As I was making them I wondered if I should share this easy, no-fail, 5-step process to create pretty floral table toppers. I am by no means a floral designer but it always seems to work for me, especially in a pinch! Let’s break it down:
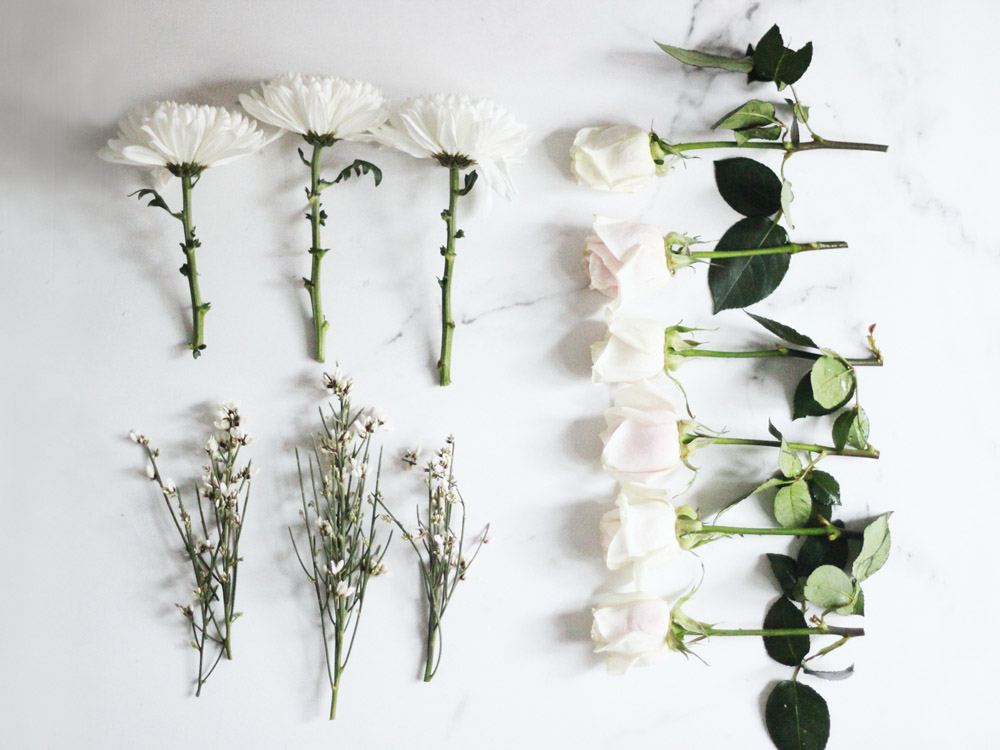
Step No. 1: Choose 3 Types of Blooms
I like to mix 3 different sizes and texture with this formula: 1/2 medium + 1/4 large + 1/4 small & tall (give or take, depending on the size of the vase). I also stick to a single color scheme to unify the composition.
Depending on your vase, cut stems at slightly different lengths. With my short 4″ square vase, I cut the stems about 5″-6″ long. (Always better to leave long and give yourself room to snip.)
Instead of using tape, I will typically keep some of the leaves on a few of the stems to help fill up the vase bottom.
/
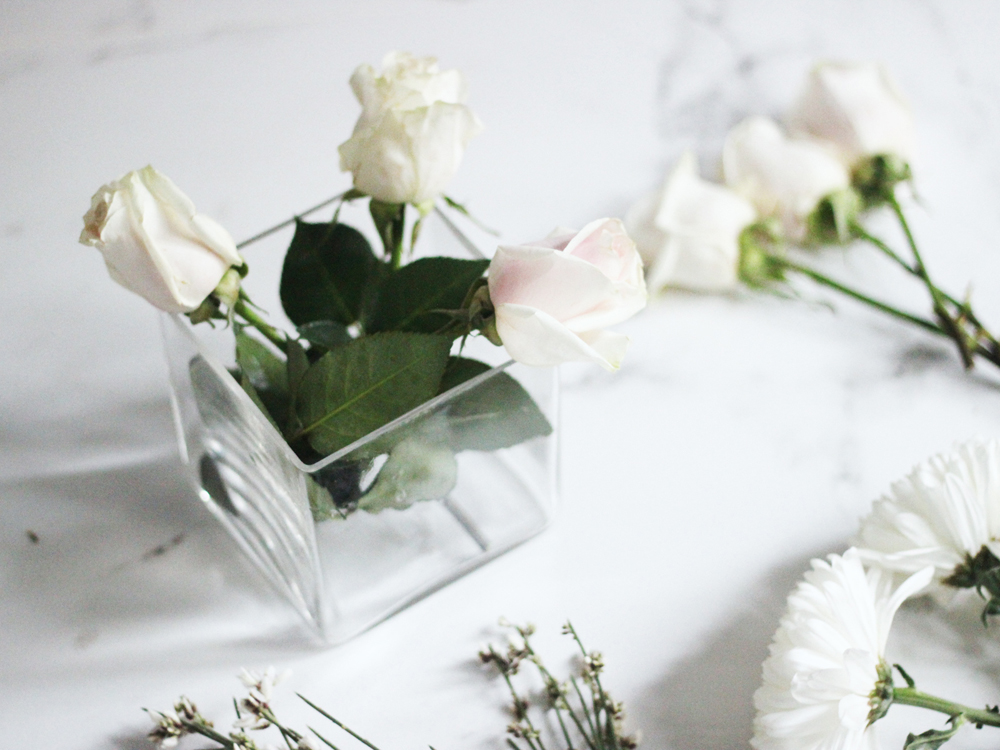
Step No. 2: Fill 3 Corners & Create a Base
I criss-cross the stems with leaves into three of the corners. This provides structure to slip the other stems into and they’ll stay put.
/

Step No. 3: Add Large Blooms
Put one of the large blooms into the fourth corner, and the other two dispersed between.
/
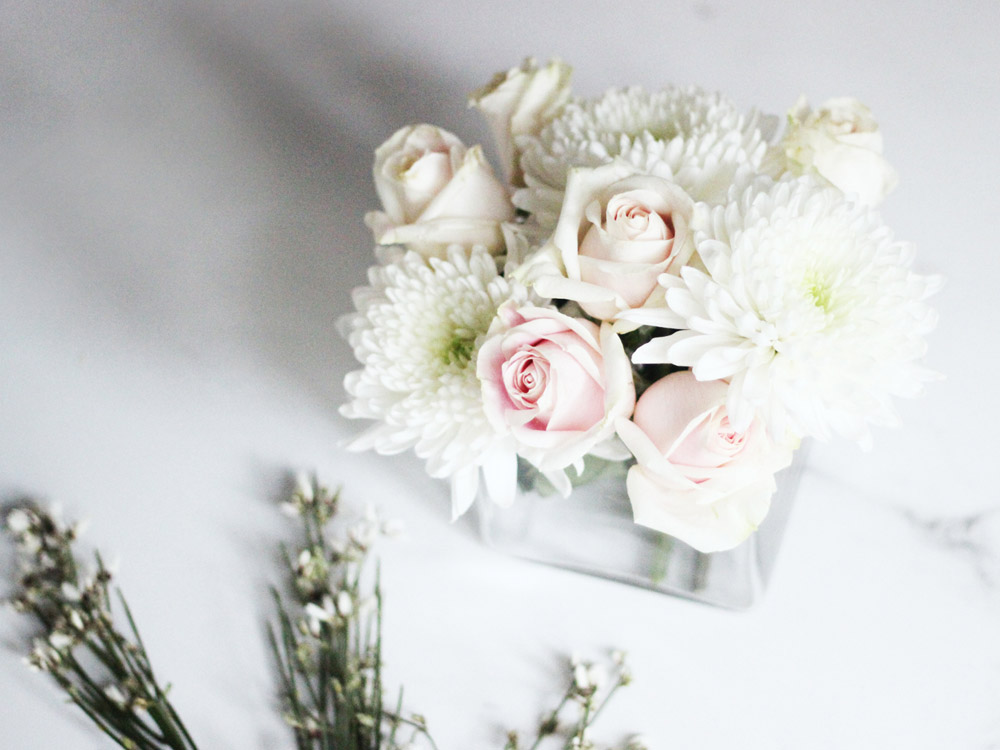
Step No. 4: Fill the Holes
Fill up the spaces with the remaining medium-sized blooms.
/
Step No. 5: Add the Accents
Finish your arrangement by adding the smaller/taller accents.
You may need to do some trimming here and there to get the right heights.
/
Hope this works for you too! If you try it, I’d love to know.
Happy creating!
![]()
Photos & styling by Erika Brechtel
I like putting florals together. This came out great. The perfect combo.
Thank you! Yes it’s always that touch of freshness and prettiness that can brighten up your day.